


TLDR:
For Vim, to enable relative line numbers, edit your
.vimrcfile. Usually located in~/.vimrcadd the following to the config file:set relativenumberFor Neovim, edit the
init.luafile, usually at~/.config/nvim/init.luaadd the following lines:vim.wo.relativenumber = true
The next time you reopen Vim or Neovim with the configuration added, you should see relative line numbers enabled.
Understanding Line Numbers in Vim or Neovim
When using Vim or Neovim, the most common way to display line numbers for files being edited or viewed is to use Normal Line Numbers or Relative Line Numbers.
Normal Line Numbers
These are the line numbers in your file that are absolute, beginning at 1 at the top and going down the file in a sequential order.
For example, in the following file opened with Neovim

Relative Line Numbers:
These are the line numbers that are shown in relation to where the cursor is now located.
Imagine that the current line that your cursor is on is number 0, and the other lines are numbered according to how far they are (up or down) from the current lines; lines below the cursor location are indicated by positive numbers, and lines above the position are shown by negative numbers.
For example:
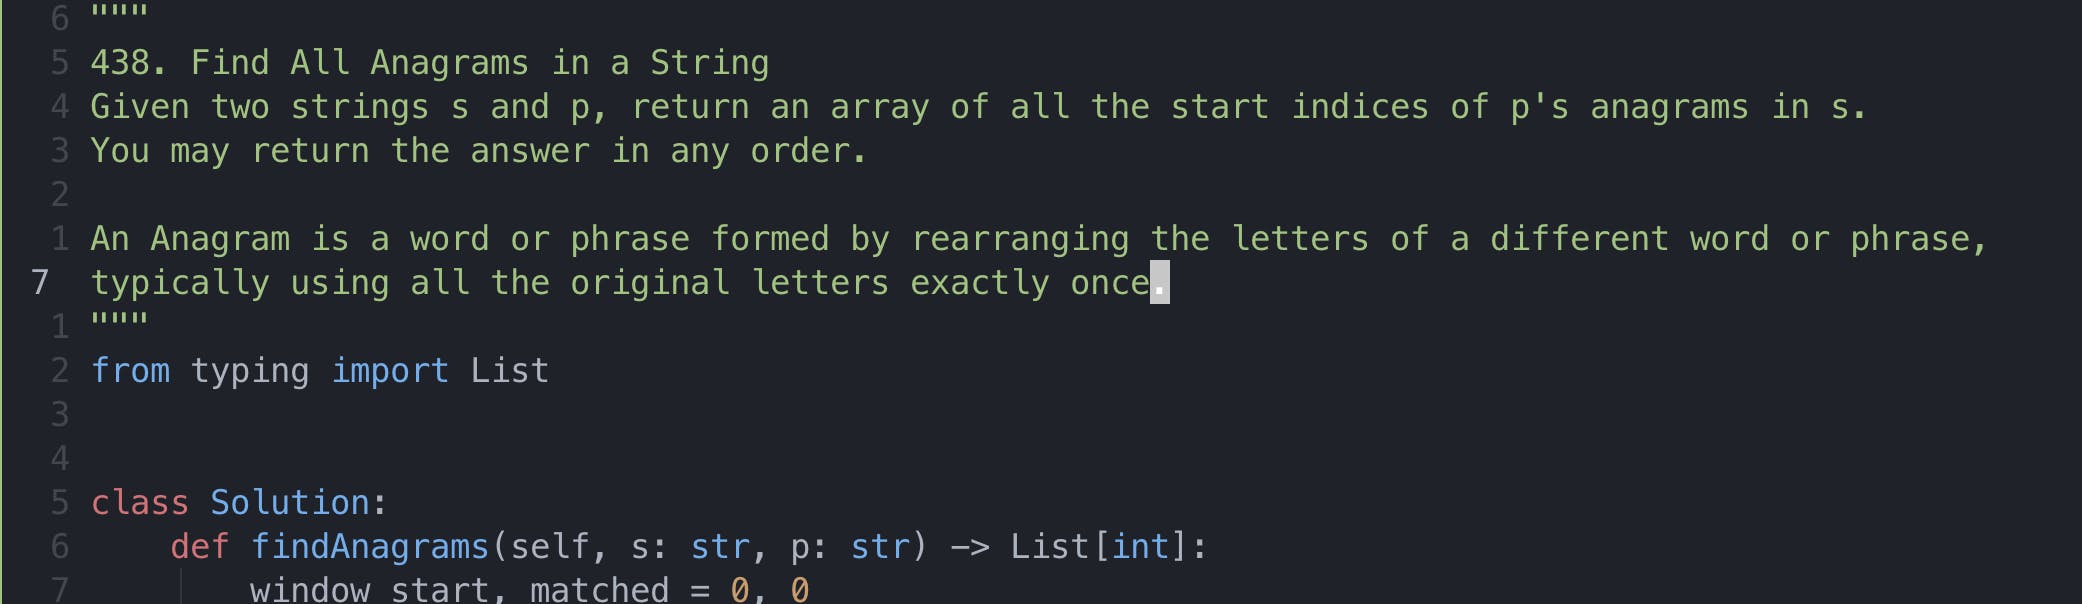
Relative line numbers come in handy when referring to adjacent lines in your code. For example, from the screenshot above, if I wanted to make a jump to the line where the definition of the findAnagrams method starts. I can see it is 6 lines relative to the current cursor position, so I have to make 6 jumps downward by pressing 6j