

Nest Guards for Fortifying Routes and Nest Pipes for Data Validation and Transformation


In the previous article in this series, we learned about Providers, Custom Providers, and Controllers in Nest. In that article, we identified the issue of invalid data coming from the user. In this article, we will first learn about Nest Guards for protecting routes and then see how Nest Pipes can be used to validate data coming from users.
Introduction to Guards in Nest

NestJS guards are like vigilant gatekeepers of your application; they have only one responsibility: allow or deny access to routes based on predefined criteria (e.g. roles, permissions, ACLs, etc.)
To create a guard in Nest, you define a class and annotate it with @Injectable decorator, and the class must implement the CanActivate interface from Nest.
This ensures that the class has a canActivate method that returns a boolean. When you return true, the request will be processed. If the returned value is false, Nest will deny the request.
Let's create an admin.guard.ts file inside of the src/ folder with the following content:
import { Injectable, CanActivate, ExecutionContext } from '@nestjs/common';

enum UserRole {
  ADMIN = 'admin',
  USER = 'user',
}

@Injectable()
export class AdminGuard implements CanActivate {
  canActivate(context: ExecutionContext): boolean {
    const requiredRole = UserRole.ADMIN;
    const user = context.switchToHttp().getRequest().user;

    if (!user || user.role !== requiredRole) {
      return false;
    }

    return true;
  }
}
Binding Guards
Guards determine whether a given request will be handled by a route handler or not, and you can apply a guard by binding it to a controller, a method in a controller, or globally. To bind a guard to a controller, or a route handler in a controller (i.e., a controller method), we make use of the @UseGuards decorator from Nest.
For illustration, let's bind the AdminGuard to the UserController:
import { Body, Controller, Get, Param, Post, UseGuards } from '@nestjs/common';
import { AdminGuard } from './auth.guard';

@Controller('users')
@UseGuards(AdminGuard)
export class UserController {
....
}
If a guard is applied at the controller level, as we did above, it will apply to all the routes and methods in that controller.
Let's instead apply the guard to the createUser route handler only, as that looks like something we will want to restrict to the admin in a real application.
...
import { AdminGuard } from './auth.guard';

@Controller('users')
export class UserController {
  constructor(private readonly userService: UserService) {}

  @Get()
  getUsers(): string {
    return this.userService.getAllUsers();
  }

  @Post()
  @UseGuards(AdminGuard)
  createUser(@Body() payload): string {
    return this.userService.createUser(payload);
  }
   ...
}
In this example, the guard only applies to the POST endpoint for createUser, it will not apply to the other route handlers in the UserController class.
Binding a Guard Globally
What if you want to apply a guard to every controller and every route handler across the whole application? That is where global guards come in.
To use a guard globally, it has to be registered globally (who would have thought :) ) This can be done in two ways. The first way to globally register a guard is to update the Nest app creation inside the main.ts file as follows:
...
import { AdminGuard } from './auth.guard';

async function bootstrap() {
  const app = await NestFactory.create(AppModule);
  app.useGlobalGuards(new AdminGuard())
  await app.listen(3000);
}
...
Inside the bootstrap function, we use app.useGlobalGuards to register a guard globally.
The other way to register a guard globally is to register it as a provider in any module, preferably in the root module. We do that in the app.module.ts as follows:
import { Module } from '@nestjs/common';
import { APP_GUARD } from '@nestjs/core';
import { AdminGuard } from './auth.guard';

@Module({
   ...
  providers: [
    AppService,
    {
      provide: APP_GUARD,
      useClass: AdminGuard,
    },
  ],
})
export class AppModule {}
When should you register global guards at the module level or with app.useGlobalGuards?
If your guard has dependencies that you need Nest to inject, then you have to register the guard at the module level. Otherwise, you can register it globally with app.useGlobalGuards
Nest Pipes: Enhancing Data Integrity
When building server-side applications, especially APIs, you will be receiving data from clients, and you cannot always trust the integrity of the data they are sending to you. Nest pipes that can help you validate user input or transform it into the desired form (e.g., convert it from string to integer)
Nest provides some default pipes, let's use one as an example. We will use one of them to transform the ID from the request parameters. We want to convert the ID to an integer. The pipe to use is the ParseIntPipe, we update the user.controller.ts as follows (I'm showing only what you need to change):
import {
  ...
  ParseIntPipe,
  ...
} from '@nestjs/common';

@Controller('users')
export class UserController {
  ...
  @Get(':id')
  getUser(@Param('id', ParseIntPipe) userId: number) {
    return this.userService.getUserById(userId);
  }
}
We also need to update the getUserById method in the UserService so that it expects a number instead of a string:
...
 getUserById(userId: number) {
    const user = this.users.find((u) => u.id === userId);
    if (!user) return {};
    return user;
  }
...
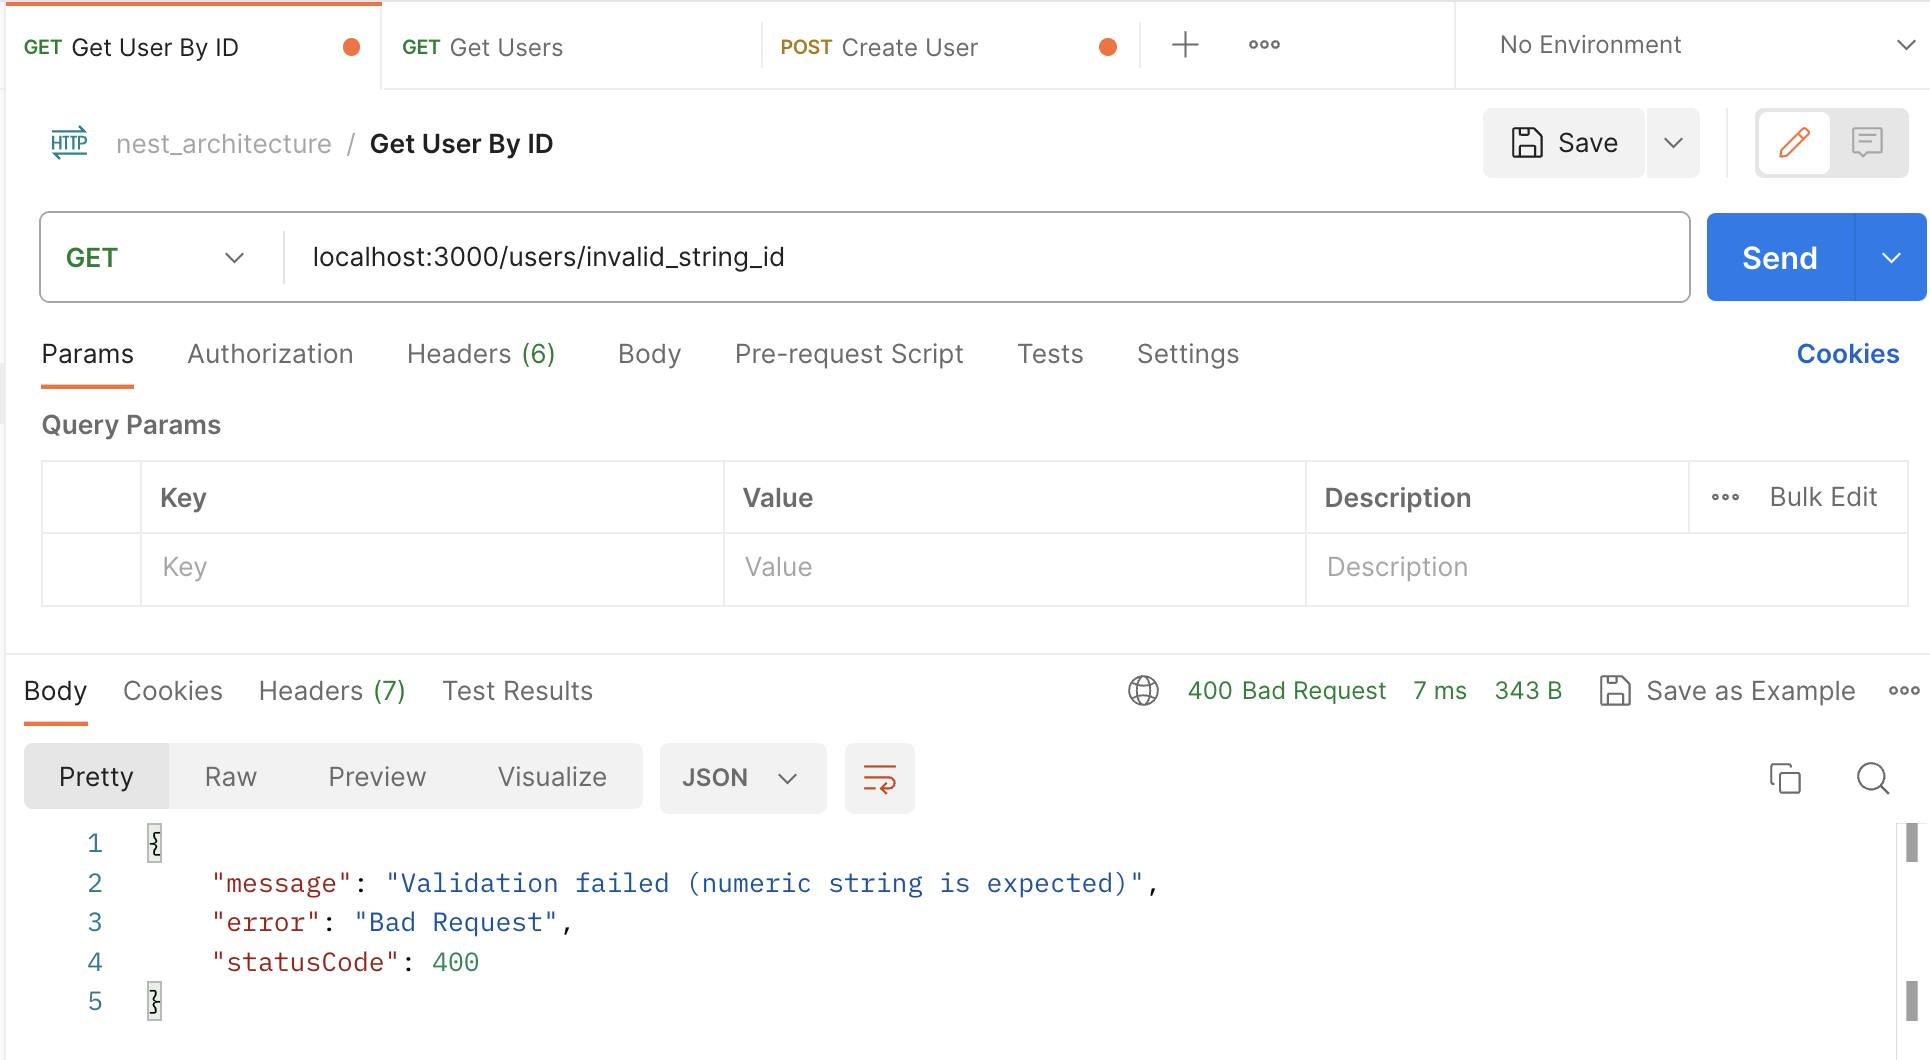
The ParseIntPipe will try to transform the ID into a valid integer number. If it fails, Nest will throw an error. Let's test by providing a string ID to the endpoint to get the user by ID:
The ValidationPipe and Class Validation
The most common way to do validation in Nest is to define the payload you are expecting from clients as a class, a data transfer object (DTO) schema. A DTO is an object that defines how data will be sent over the network, i.e., how you want clients to send request payloads.
To validate a DTO, we will first bind ValidationPipe at the application level in main.ts:
import { NestFactory } from '@nestjs/core';
import { AppModule } from './app.module';
import { ValidationPipe } from '@nestjs/common';

async function bootstrap() {
  const app = await NestFactory.create(AppModule);
  app.useGlobalPipes(new ValidationPipe());
  await app.listen(3000);
}
bootstrap();
We also need to install some required packages:
# using yarn to add dependencies
yarn add class-validator class-transformer
# or if you want to use npm
npm i --save class-validator class-transformer
Then we create a new folder dto inside the user folder and create a file create-user.dto.ts inside with the following content:
import { IsEmail, IsNotEmpty } from 'class-validator';

export class CreateUserDto {
  @IsEmail()
  email: string;

  @IsNotEmpty()
  password: string;
}
Here we are using two decorators from the class-validator package. The @IsEmail verifies that the email property of the request body must be a valid email. And @IsNotEmpty makes sure that the password property is not empty.
We will first update the user.service.ts to use the DTO (I'm showing only what you need to change):
...
import { CreateUserDto } from './dto/create-user.dto';

@Injectable()
export class UserService {
 ...
  createUser(payload: CreateUserDto) {
    const newUser = {
      id: Date.now(),
      ...payload,
    };
    this.users.push(newUser);
    return newUser;
  }
  ...
}
Then the user.controller.ts :
...
import { CreateUserDto } from './creat-user.dto';

@Controller('users')
export class UserController {
 ...
  @Post()
  createUser(@Body() dto: CreateUserDto): string {
    return this.userService.createUser(dto);
  }
  ...
}
Testing the API
Now, if we try to create a new user with an invalid email or an empty password, the request will fail. Let's try this:
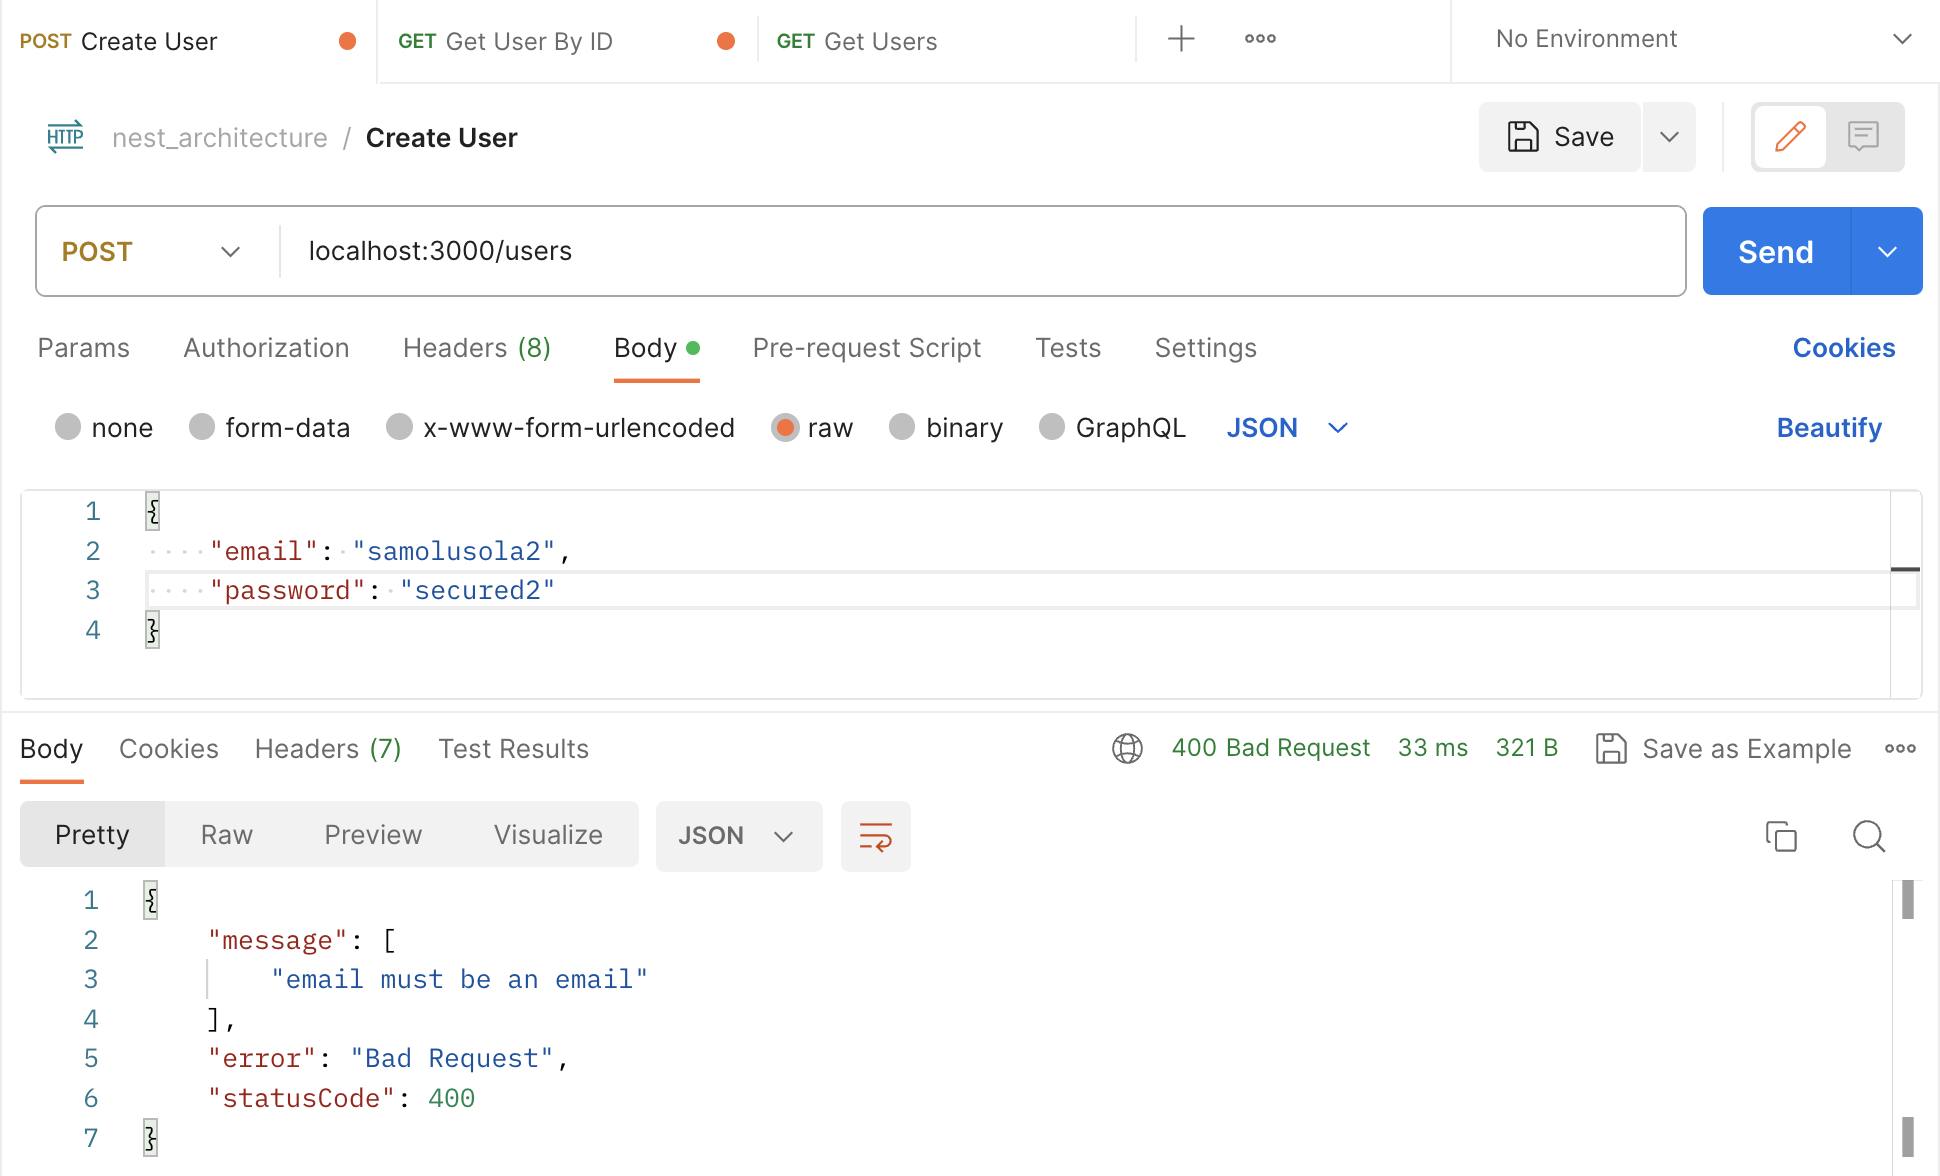
You can see that Nest also returns a nice error message that tells what the problem is. If we retry with a valid email, the request will go through:
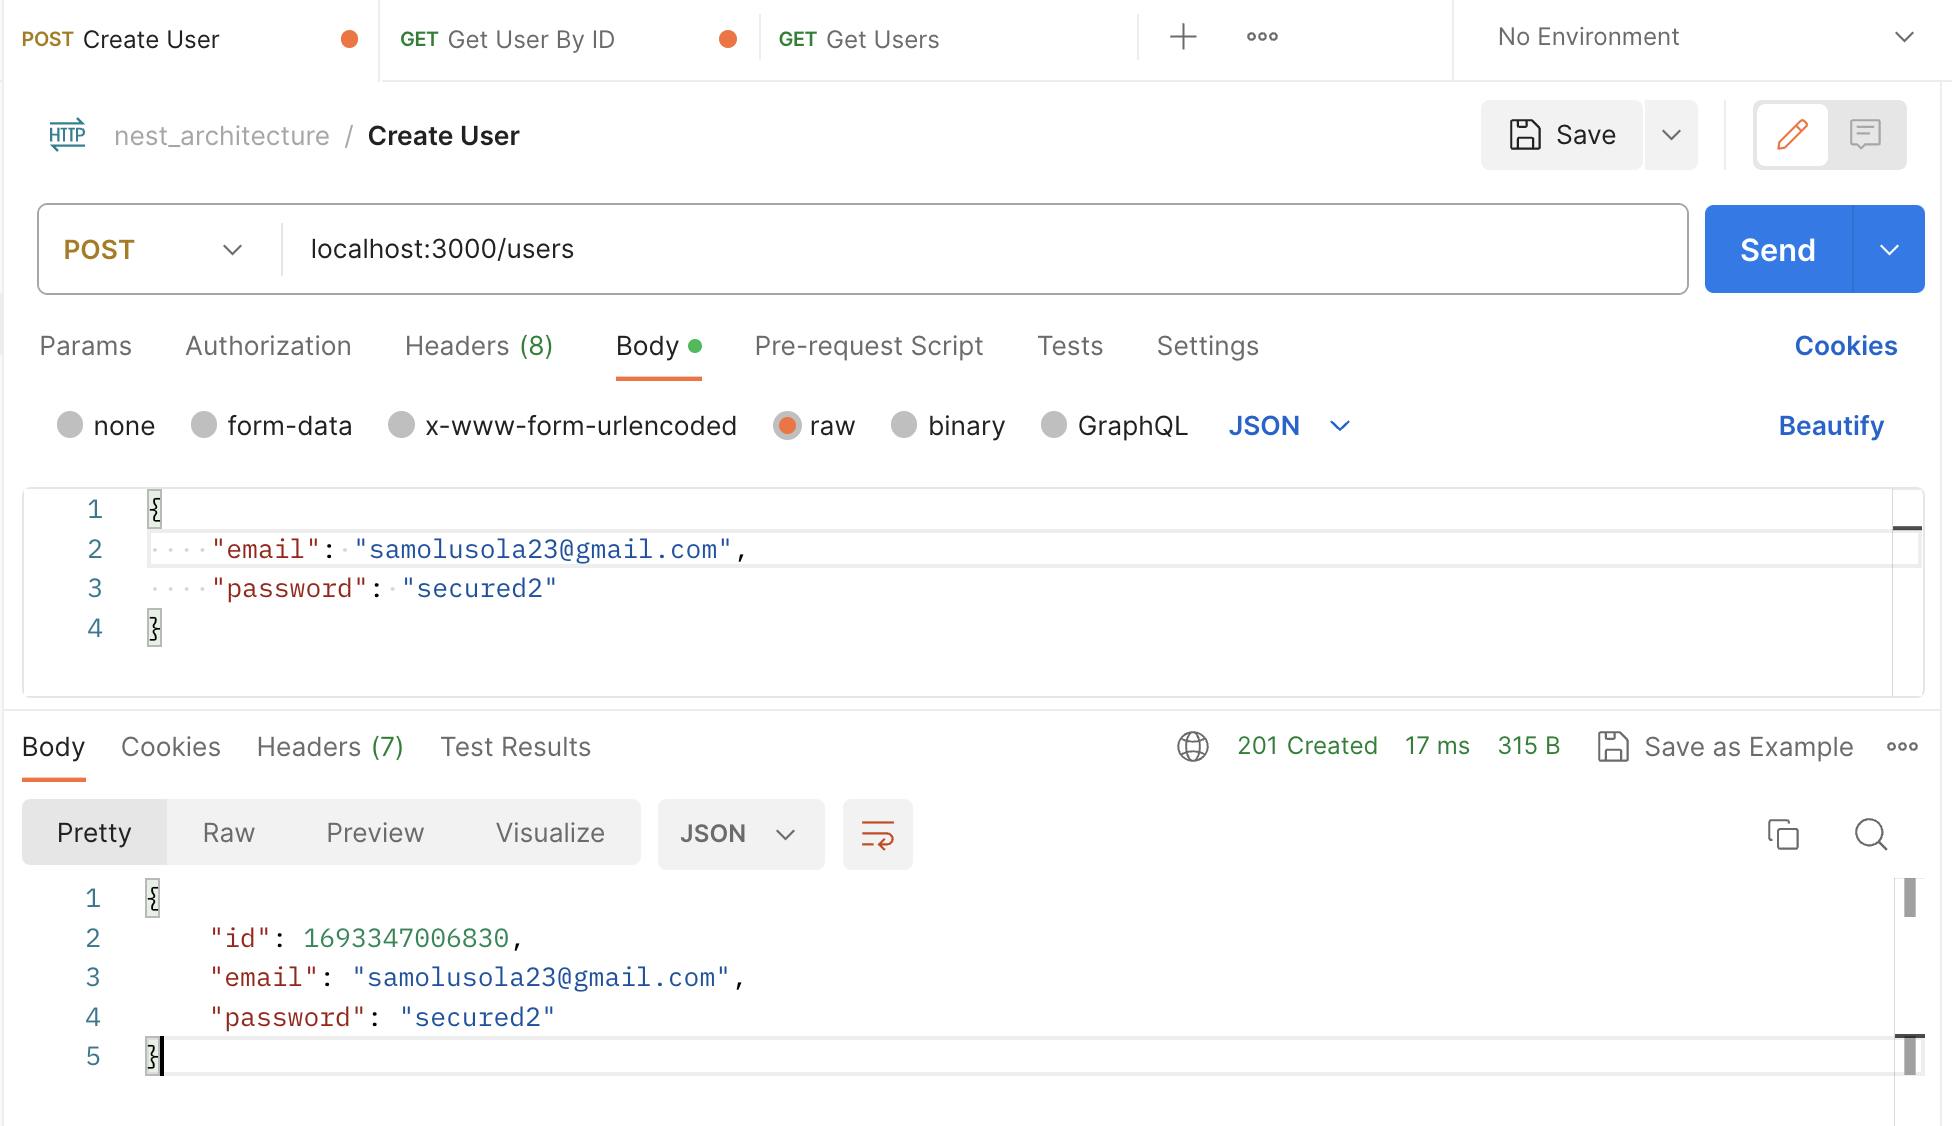
Note (again): In a real-world application, you should never return your user passwords (or emails) as plain-text. This is merely for illustration
Conclusion
In the third post of this series, we went through Nest Guards for guarding our API, and Nest Pipes for validation and transformation of data coming from the user.
In the final post of the series, we will look into the solution Nest provides us to handle when something unexpected happens in our application: Exception Filters.
See you. Happy coding :)