


In the preceding article of this series, we explored the underlying principles of NestJS, its Dependency Injection mechanism, Providers and Nest Module. In this second part, we will learn more about Nest Providers, Custom Providers, and Controllers. We will build out API endpoints that we can test with Postman.
Shall we begin?
Nest Providers: Empowering Application Logic
The core idea of Nest Providers is that they can be injected as a dependency. Providers include services, repositories, factories, helpers, and so on that you can use to build your application logic.
As explained earlier, with Nest, you can create various relationships between objects, and the function of 'wiring up' instances of objects can largely be handled by the Nest runtime system.
Think of this as an orchestra where each musician specializes in their instrument (service), and the conductor (Nest's Dependency Injection System) coordinates their harmonious performance to create a beautiful symphony (application).
Services
In Nest, we usually put the business logic in Services with a .service.ts file extension. Services are defined as Injectable so that Nest's DI can easily inject them into controllers, modules, or other services.
Let's create a new service for the user module we generated earlier. Run the following command:
nest generate service user/user --flat
This command will generate a user.service.ts file and a user.service.spec.ts file inside the /user folder.
We will update the user.service.ts file to contain the following:
import { Injectable } from '@nestjs/common';

@Injectable()
export class UserService {
  private readonly users = [];

  getUsers() {
    return this.users;
  }

  createUser(payload) {
    const newUser = {
      id: Date.now(),
      ...payload,
    };
    this.users.push(newUser);
    return newUser;
  }

  getUserById(userId: string) {
    const user = this.users.find((u) => u.id === Number(userId));
    if (!user) return {};
    return user;
  }
}
The @Injectable decorator defines the UserService class as a provider that can be managed by Nest's DI system.
Provider Registration
After defining a provider (UserService), we need to register it with Nest so that it can be injected. We register a provider by adding it to the providers array of a module. Because we generated the UserService with the Nest CLI, the CLI will automatically add it to the UserModule inside of src/user/user.module.ts:
import { Module } from '@nestjs/common';
import { UserService } from './user.service';

@Module({
  providers: [UserService], // provider registration
  imports: [],
  controllers: [],
  exports: [],
})
export class UserModule {}
(I have included the other properties of the @Module() decorator i.e imports, controllers, exports, they are usually omitted when they are empty)
The providers property accepts an array of providers, and in this case, only the UserService was included as follows: providers: [UserService]. This syntax is a shorthand for the more complete syntax:
 providers: [
    {
      provide: UserService, // provider token
      useClass: UserService,
    },
  ]
The value of the provide property is the provider token, which is used by Nest to identify a provider.
With this longer syntax, we are explicitly telling Nest that whenever the resource identified by the token UserService is requested to be injected, it should use the class UserService. The short-hand notation is merely a convenience to simplify the most common use case, where the token is used to request an instance of a class by the same name.
With this explicit registration, we can tell Nest to use a different class when it encounters a request for UserService, for example, mocking during testing:
  providers: [
    {
      provide: UserService,
      useClass: UserMockService, // Nest will inject an instance of UserMockService in place of UserService
    },
  ],
This is an example of a Custom Provider.
Provider tokens are not restricted to classes alone, we can use a string or a symbol as a token. We are also not restricted to using classes (useClass) to tell Nest how to get the value for a token, we can also use useValue to provide a value directly or useFactory to create providers dynamically.
More Examples of Custom Providers
To further illustrate creating a custom provider and registering it with useFactory, let's create an SmsModule. We will assume that we will be using the Twilio package. First, we add the package to the project:
yarn add twilio
Then we create a new SmsModule and an SmsService. Let's run the following commands:
# g is a shorthand for 'generate' and mo is for 'module'
nest g mo sms

# s is short for 'service'
nest g s sms/sms --flat
Update the SmsModule found inside of src/sms/sms.module.ts to contain the following:
import { Module } from '@nestjs/common';
import * as twilio from 'twilio';
import { SmsService } from './sms.service';

@Module({
  providers: [
    SmsService,
    {
      provide: 'SMS_CLIENT',
      useFactory: () => {
        return twilio('AC_<Twilio Account SID>', '<Twilio Account Token>');
      },
    },
  ],
  exports: [SmsService],
})
export class SmsModule {}
To inject the custom SMS_CLIENT into the SmsService, we update sms.service.ts as follows:
import { Inject, Injectable } from '@nestjs/common';
import { Twilio } from 'twilio';

@Injectable()
export class SmsService {
  constructor(
    @Inject('SMS_CLIENT')
    private twilioClient: Twilio,
  ) {}

  public async send(body): Promise<string> {
    const msg = await this.twilioClient.messages.create(body);
    return msg.sid;
  }
}
We use @Inject decorator to declare to Nest that we want to inject a provider identifiable with the custom SMS_CLIENT token, this value must match the value of the token used to register the provider in the SmsModule . We only need to do this for custom providers.
It is advisable to put custom provider tokens in an enum so that you don't have to type the string value all the time.
To do that, we will create a file src/utils/custom-provider-tokens.ts with the following content:
export enum CustomProviderTokensEnum {
  SMS_CLIENT = 'SMS_CLIENT',
}
Then in the module, we do:
import { Module } from '@nestjs/common';
import * as twilio from 'twilio';
import { SmsService } from './sms.service';
import { CustomProviderTokensEnum } from 'src/utils/custom-provider-tokens';

@Module({
  providers: [
    SmsService,
    {
      provide: CustomProviderTokensEnum.SMS_CLIENT,
      useFactory: () => {
        return twilio('AC_<Twilio Account SID>', '<Twilio Account Token>');
      },
    },
  ],
  exports: [SmsService],
})
export class SmsModule {}
And in the SMS service:
import { Inject, Injectable } from '@nestjs/common';
import { CustomProviderTokensEnum } from 'src/utils/custom-provider-tokens';
import { Twilio } from 'twilio';

@Injectable()
export class SmsService {
  constructor(
    @Inject(CustomProviderTokensEnum.SMS_CLIENT)
    private twilioClient: Twilio,
  ) {}

  public async send(body): Promise<string> {
    const msg = await this.twilioClient.messages.create(body);
    return msg.sid;
  }
}
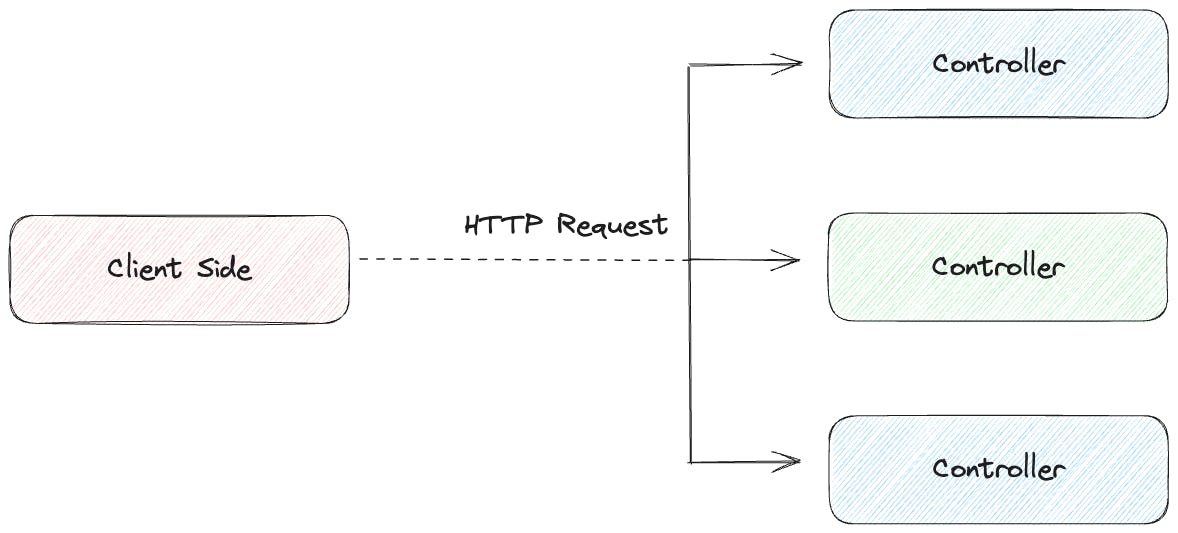
Nest Controllers: Crafting API Routes and Handling Requests
Just as a ship's captain navigates the seas, controllers steer incoming requests to their destinations, generating meaningful responses. They are responsible for handling incoming requests and returning responses to the client.
Nest uses decorators to define controllers and the routes that they handle. We can generate a user controller by running the following command:
# g is short for 'generate', co for 'controller'
nest g co user/user --flat
This generates a user.controller.ts file inside of the src/user folder. We will update it to the following:
import { Body, Controller, Get, Param, Post } from '@nestjs/common';
import { UserService } from './user.service';

@Controller('users')
export class UserController {
  constructor(private readonly userService: UserService) {}

  @Get()
  getUsers() {
    return this.userService.getUsers();
  }

  @Post()
  createUser(@Body() payload) {
    return this.userService.createUser(payload);
  }

  @Get(':id')
  getUser(@Param('id') userId: string) {
    return this.userService.getUserById(userId);
  }
}
Here, a user controller is defined with @Controller('users'). Because we passed users to the decorator, all the routes inside the controller will be grouped under /users.
Notice that we are requesting that Nest inject the UserSerivice provider into the UserController class via the constructor: constructor(private readonly userService: UserService) {}
We have also defined three endpoints, two for HTTP GET requests and one for a POST request. Defining endpoints, also known as route handlers, in Nest is as simple as decorating the class methods with HTTP methods imported from the @nestjs/common library.
With the @Body() decorator, Nest parses the body of the request and it becomes available in the variable declared, payload:
 ...
  @Post()
  createUser(@Body() payload) {
    return this.userService.createUser(payload);
  }
...
We can also define route parameters by adding a parameter token in the path of the route. A parameter token is defined in this format ':parameterKey' within an HTTP method. In our case @Get(':id') defines an id route parameter. You can access the value of the parameter by providing the token to the @Param(..) decorator.
Registering Controllers
After defining a controller with the @Controller decorator, we also need to register the controller with Nest so that the controller and its route can be available in the Nest application. To do that, we add it to the controllers array of the UserModule.
Because we generated the controller with the Nest CLI, it is automatically registered in the src/user/user.module.ts file
import { Module } from '@nestjs/common';
import { UserService } from './user.service';
import { UserController } from './user.controller';

@Module({
  imports: [],
  controllers: [UserController],
  providers: [UserService],
})
export class UserModule {}
Testing the Controller Routes
We need to start the application by running the following command:
yarn start:dev
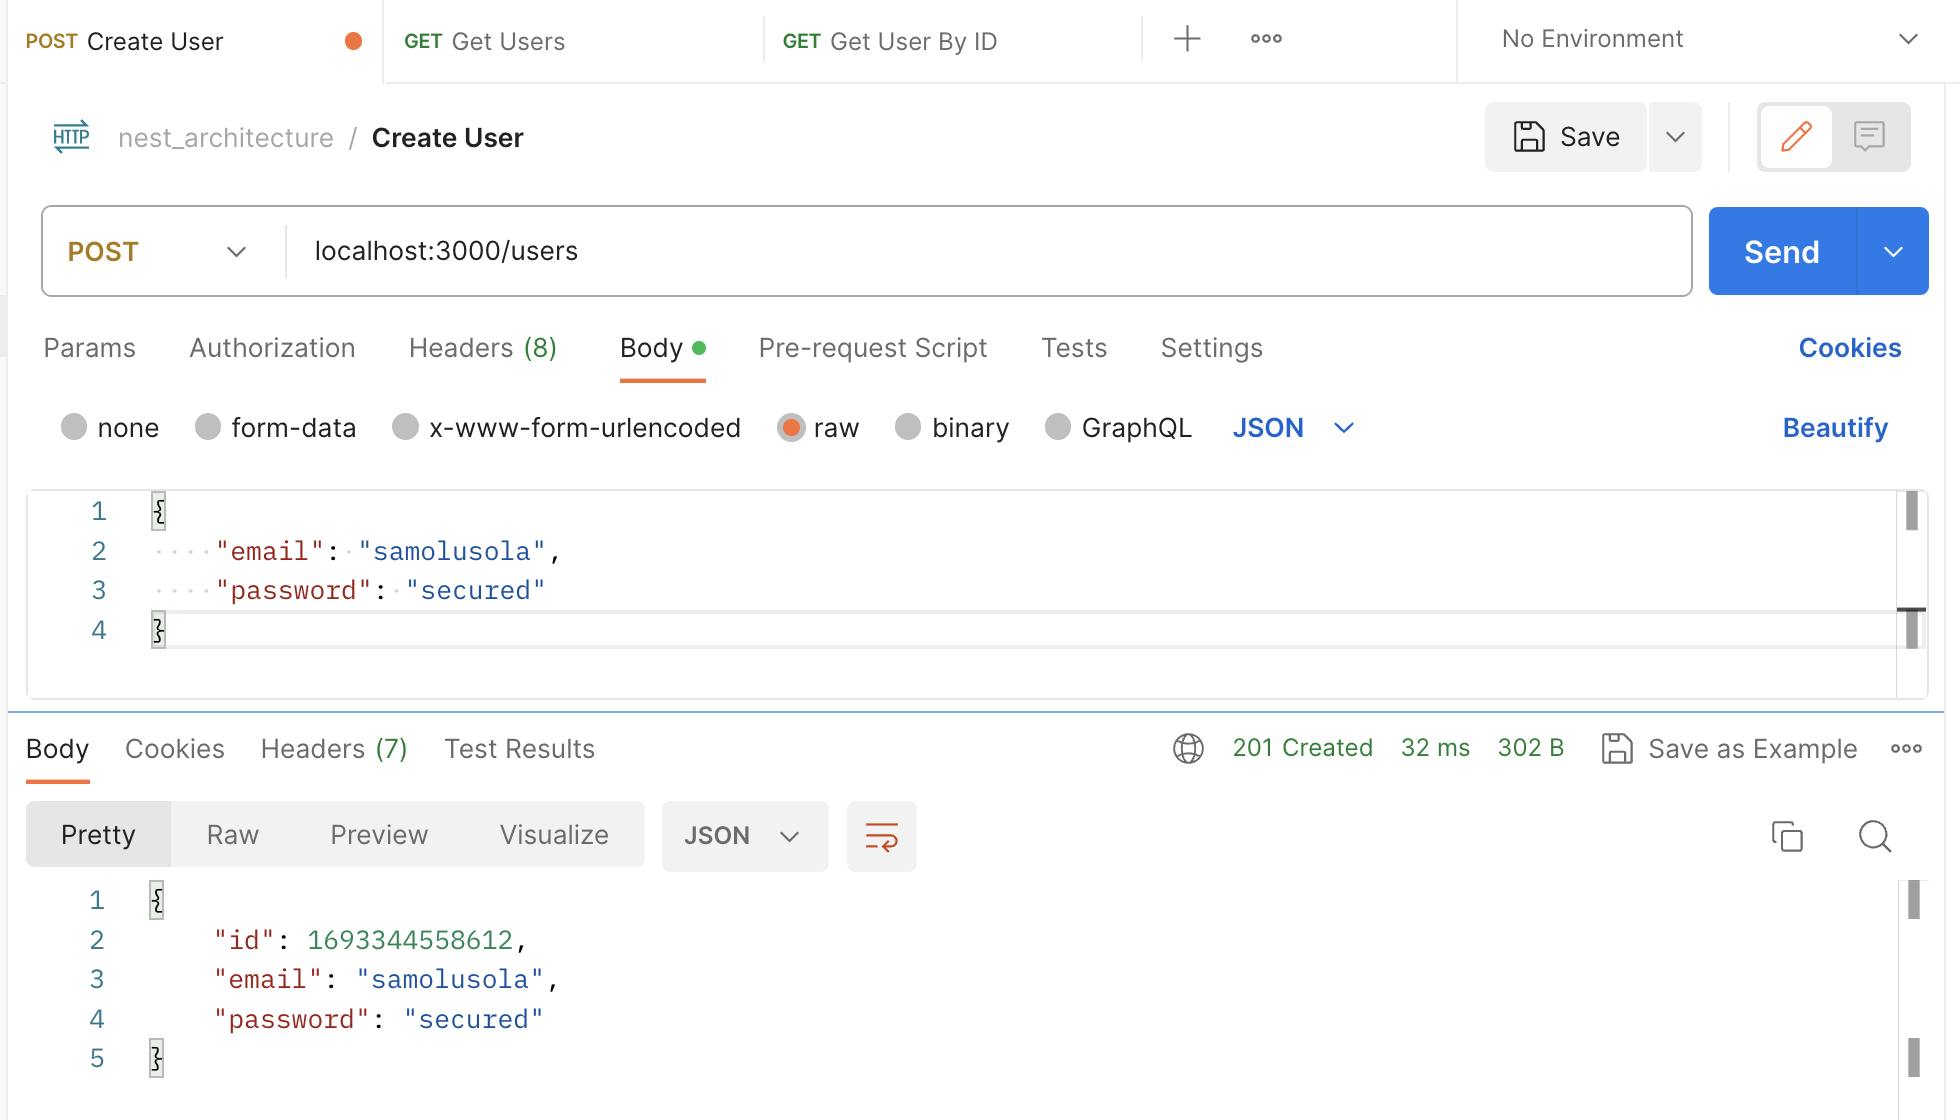
After the application starts, we can test out the endpoints on postman. The application starts on localhost:3000:
Creating a user:
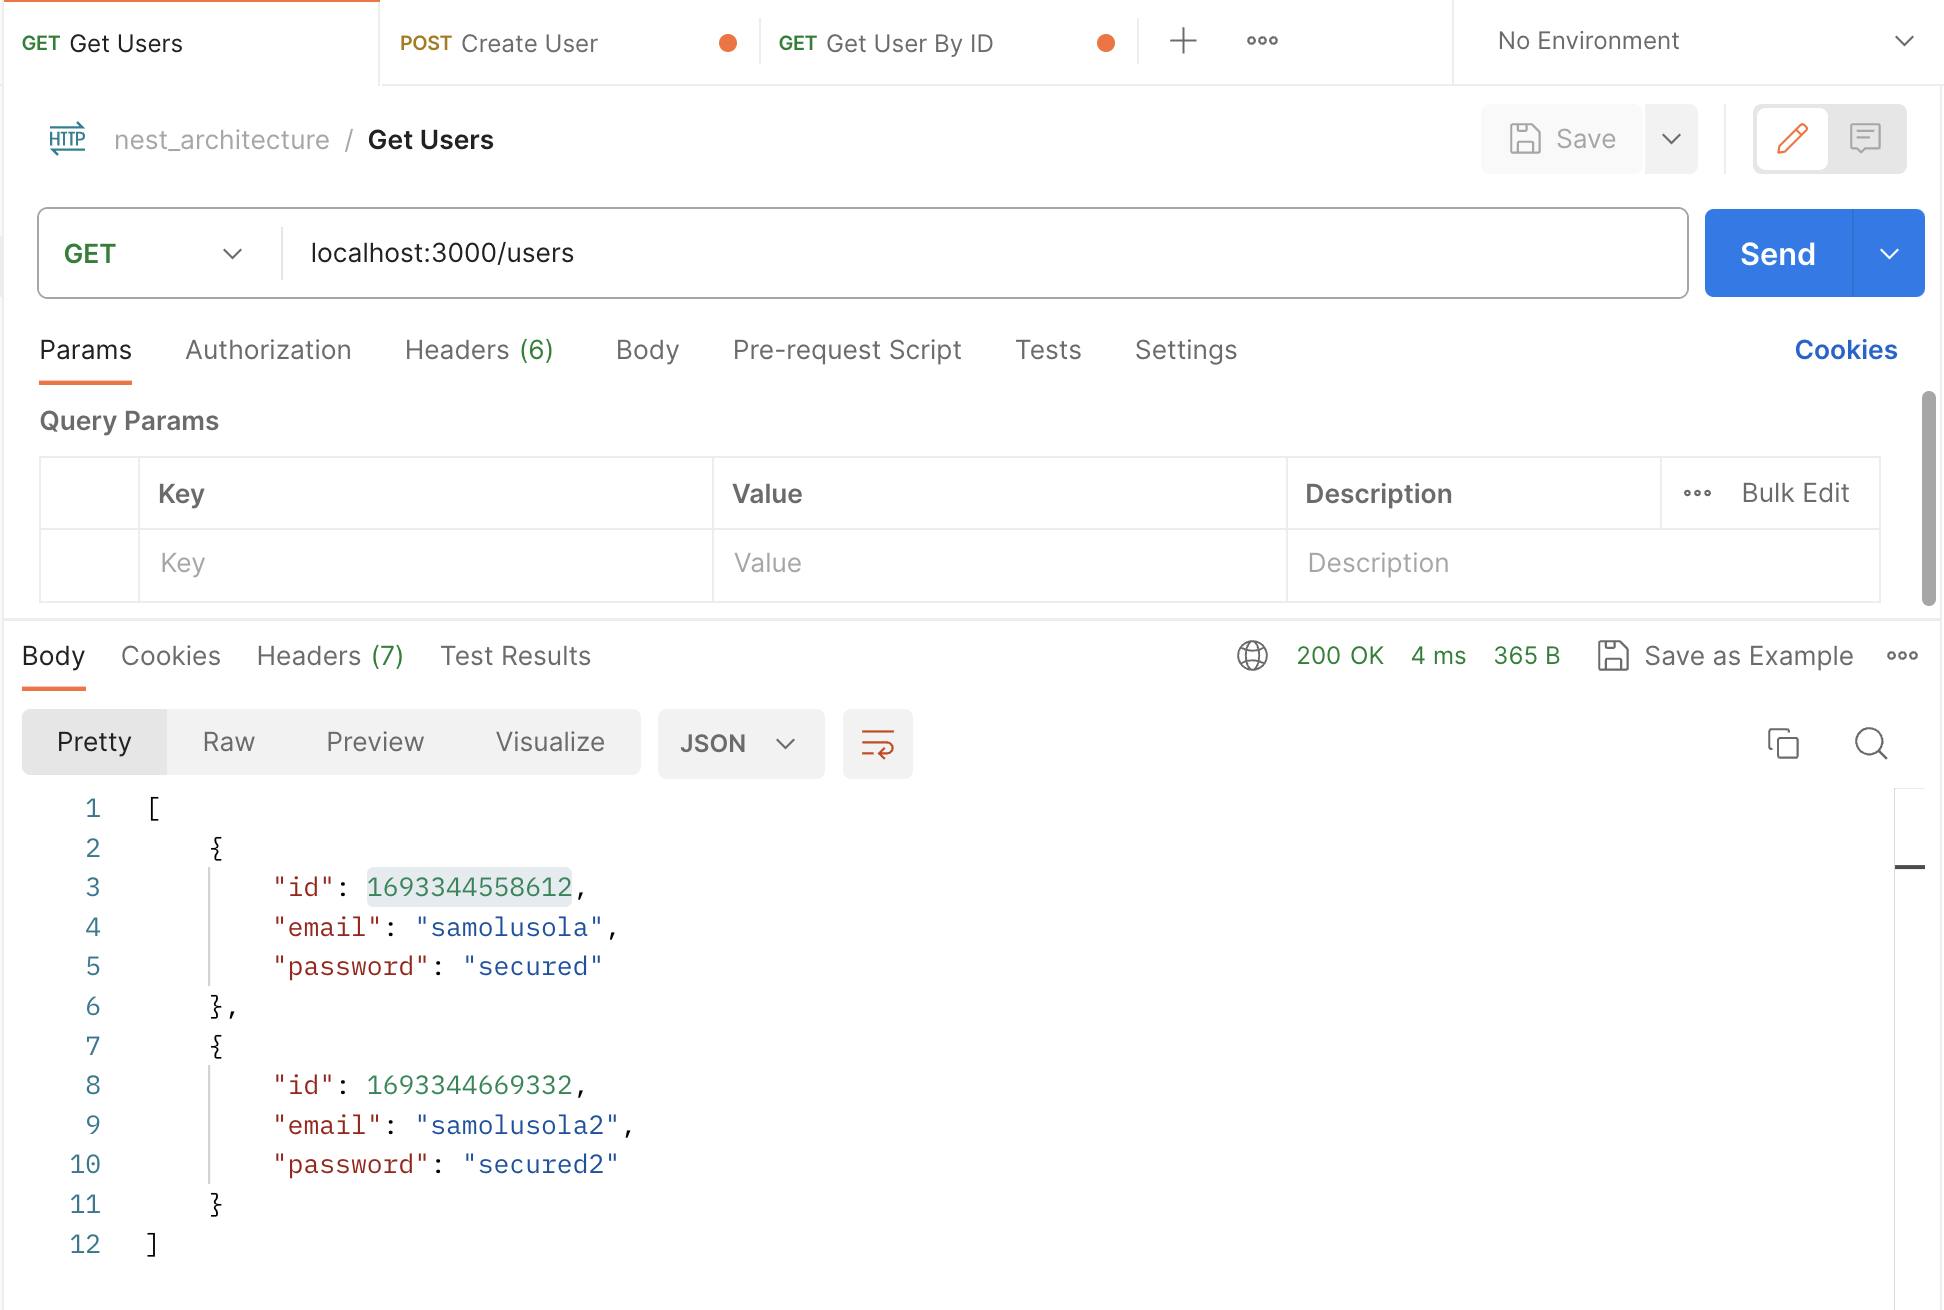
Getting all users:
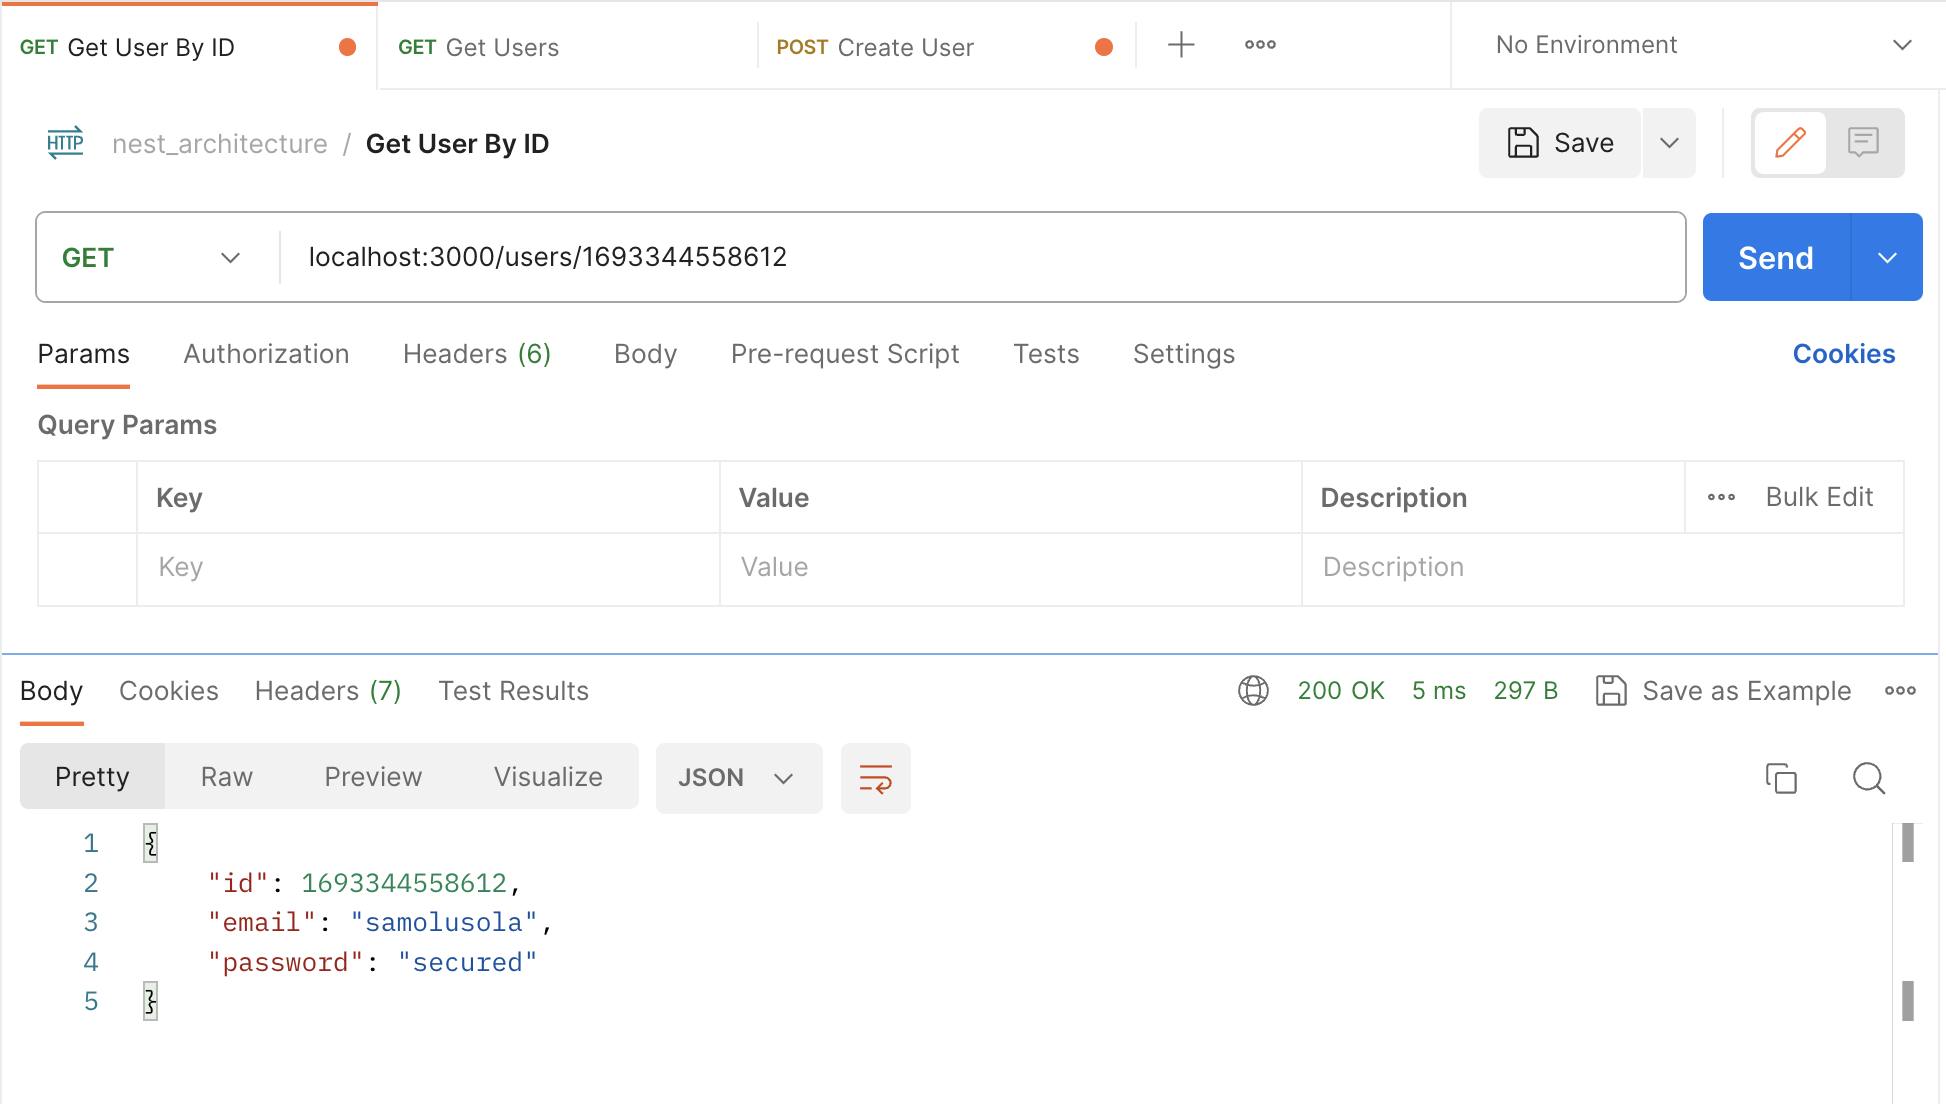
Get a User By ID:
Note: The API endpoints are purely for teaching purposes, you should never expose your user passwords (or plain emails) in your REST API.
Side Note: Did you notice an inconsistency with the API endpoint for creating a user? The email field is supposed to be a valid email address, but any string works at the moment. This will be rectified in the next post in this series, where we introduce Nest Pipes
Conclusion
In this second part of the series, we went through Nest Providers, Custom Providers, Controllers and how we can inject providers into controllers as dependencies.
In the next article in this series, we will be going through how we can protect API endpoints with Nest Guards. And how Nest Pipes can help us validate and transform the data we are collecting from clients.
See you there. Happy coding :)